Wednesday, December 26, 2012

Family

Around Thanksgiving we took family pictures with my side of the family.  I wanted to wait to post until after all the Christmas cards went out so I didn't ruin any surprises.
Wyatt is just the cutest little guy around.
And so full of smiles!
Even though we were freezing it was fun to take the pictures.
I am so thankful for my amazing family!

Tuesday, December 25, 2012

The Christmas Story

I saw this video for the first time this morning on another blog and just had to share!  It's the cutest thing ever!    Wishing you all a Very Merry Christmas!!

Thursday, December 20, 2012

Snow Day

I woke up this morning to the wind howling.  Justin was heading out the door to work and informed me that we got some snow.  I immediately sat down to check the school closings...just in case.  There we were, right at the bottom of the list, school was closed for the day!
It was so nice to stay home and get some last minute Christmas wrapping and baking done.  One more day tomorrow and the real break begins!! 

Wednesday, December 19, 2012

Taste of Our Home Tuesday Pan-Roasted Chicken With Lemon-Garlic Green Beans

I found this recipe on Pinterest and thought it looked amazing.  Sadly I did not read the recipe correctly as I was in a hurry to make it.  Instead of juicing one of my lemons, I sliced them both and put them in the bottom of the pan.  As a result we ended up with the most lemony green beans of all time.  We couldn't eat the beans they were so bad, but the chicken and potatoes had a wonderful flavor.  I am planning on trying this again because it truly does look like a yummy recipe!     
Ingredients
6  tablespoons  olive oil
2 lemons, 1 thinly sliced, 1 juiced
4 cloves garlic, minced
1  teaspoon  kosher salt
1/2  teaspoon  freshly ground black pepper
3/4  pound  trimmed green beans
8 small red potatoes, quartered
4 chicken breasts (bones left in, with skin, about 3 1/4 pounds)

Directions
1. Preheat oven to 450°F. Coat a large baking dish or cast-iron skillet with 1 tablespoon of the olive oil. Arrange the lemon slices in a single layer in the bottom of the dish or skillet.
2. In a large bowl, combine the remaining oil, lemon juice, garlic, salt, and pepper; add the green beans and toss to coat. Using a slotted spoon or tongs, remove the green beans and arrange them on top of the lemon slices. Add the potatoes to the same olive-oil mixture and toss to coat. Using a slotted spoon or tongs, arrange the potatoes along the inside edge of the dish or skillet on top of the green beans. Place the chicken in the same bowl with the olive-oil mixture and coat thoroughly. Place the chicken, skin-side up, in the dish or skillet. Pour any of the remaining olive-oil mixture over the chicken.
3. Roast for 50 minutes. Remove the chicken from the dish or skillet. Place the beans and potatoes back in oven for 10 minutes more or until the potatoes are tender. Place a chicken breast on each of 4 serving plates; divide the green beans and potatoes equally. Serve warm.
Tip
Choose firm potatoes that are free of sprouts. Avoid ones with a greenish tint; they can be bitter.

Sunday, December 16, 2012

Christmas Decorations

As I made some new Christmas decorations this year, my goal was to come up with something that reminded Justin and I daily of the true meaning of Christmas.  We wanted this year to be different.  We wanted to slow down and cherish each moment with family and friends.  We wanted to give instead of get.  So often we get caught up in the hustle and bustle and Christmas is over before we know it.  We want this year and every year after to be focused on Jesus. 
In my search I came across this picture on Pinterest.
 
 We are removing and replacing windows so I came up with this version to set on my piano (since I don't have a mantle:))
I found a similar picture of this on Pinterest as well.  I loved how the manger scene was in the middle and the shepherds and wise men were facing it. 
A good daily reminder I will probably leave out all year round.

Tuesday, December 11, 2012

Taste of Our Home Tuesday: Pumpkin Crumb Cake

Around Thanksgiving I had found this recipe on Pinterest and pinned it.  I love anything pumpkin.  I didn't have time to try it until Sunday.  It is super moist and delicious!  The topping is a little crunchy and hard to cut through without smashing the cake underneath.  I really like that it's made in a loaf size pan instead of a large cake pan, it's easier for us to get it eaten before it's not good anymore.  Here is the original site where the cake was pinned from.  Enjoy!     
Picture by: Mommy? I'm Hungry!
Cake Batter
1 3⁄4 cups all-purpose flour
1 1⁄2 teaspoons pumpkin pie spice
1 teaspoon baking soda
1 teaspoon baking powder
3⁄4 teaspoon salt
1⁄2 cup (1 stick) unsalted butter
1 1⁄4 cups sugar
3 large eggs
1 cup canned pureed pumpkin
1 teaspoon vanilla extract
1⁄3 cup milk
3⁄4 cup chopped walnuts (optional)

Topping
2⁄3 cup plus 2 tablespoons rolled oats
1⁄2 cup all-purpose flour
1⁄2 cup firmly packed light brown sugar
1⁄2 teaspoon cinnamon
6 tablespoons unsalted butter

Directions
Preheat oven to 350°F.
-Grease a 9x5x3-inch loaf pan and line with parchment paper.
-To make the topping, combine 2⁄3 cup oats, flour, sugar, and cinnamon in processor. Add butter and cut in until crumbly. Transfer mixture to medium bowl. Stir in remaining 2 tablespoons oats. Set to one side.
Sift the flour, pumpkin spice, baking soda, baking powder, and salt into a bowl.
-In a separate bowl, beat the butter with an electric mixer until smooth. Gradually beat in the sugar and 1 egg at a time.
-Add the pumpkin and vanilla extract to the wet batter mix.
-Gradually beat the dry ingredients into the batter. Slowly add the milk and stir in the walnuts (optional). Transfer the batter to the prepared pan and spread with the topping.
-Bake the loaf cake until a toothpick inserted into center comes out clean, about 55 minutes. Cool in the pan for 15 minutes.
-Turn the cake out onto a rack and cool completely.

Monday, December 3, 2012

Taste of Our Home Tuesday: Tilapia Parmesan

I found this Parmesan recipe on Pinterest a while back.  I was looking for something quick for dinner tonight and decided to give it a try.  Justin and I both really enjoyed it!  Instead of Tilapia I used the Swai I had on hand.  The Swai was rich, but the it turned out to be delicious!  You can find the original recipe here.  Enjoy!
Photo by KC_Cooker
2 lbs tilapia fillets (orange roughy, cod or red snapper can be substituted)
2 tablespoons lemon juice
1/2 cup grated Parmesan cheese
4 tablespoons butter, room temperature
3 tablespoons mayonnaise
3 tablespoons finely chopped green onions
1/4 teaspoon seasoning salt (I like Old Bay seasoning here)
1/4 teaspoon dried basil
black pepper
1 dash hot pepper sauce

Directions:
Preheat oven to 350 degrees.
In buttered 13-by-9-inch baking dish or jellyroll pan, lay fillets in single layer.
Do not stack fillets.
Brush top with juice.
In bowl combine cheese, butter, mayonnaise, onions and seasonings.
Mix well with fork.
Bake fish in preheated oven 10 to 20 minutes or until fish just starts to flake.
Spread with cheese mixture and bake until golden brown, about 5 minutes.
Baking time will depend on the thickness of the fish you use.
Watch fish closely so that it does not overcook.
Makes 4 servings.
Note: This fish can also be made in a broiler.
Broil 3 to 4 minutes or until almost done.
Add cheese and broil another 2 to 3 minutes or until browned.

Tuesday, November 27, 2012

Taste of Home Tuesday: Simple Cream Cheese Danish

Yesterday we had some friends over for dinner.  I was looking for a quick dessert and found these cream cheese danishes I had pinned on Pinterest a while back.  Justin thought they sounded good so we quick made them.  We like cherries so I added cheery pie filling to each danish.  They were delicious!!  I loved how simple and quick they were!  We will be making these often in the future. 
Ingredients:
2 cans of crescent rolls
1 8oz package of cream cheese at room temp.
1/2 cup white sugar
1 tsp lemon juice
3/4 tsp vanilla
1 tsp sour cream
Optional: pie filling or fruit preserves of your choice

Icing:
1 cup confectioner's sugar
1 tbsp milk
1 tbsp softened butter


Preheat the oven to 350.
Open the crescent rolls carefully to avoid unrolling or tearing the dough. You'll need to leave it in it's cylindrical shape. Slice the dough into pieces about 1/4 inch thick (as though you're slicing cookie dough). Place the slices on a cookie sheet and press the center in to make an indentation for the cream cheese filling.
In a large mixing bowl, mix together the cream cheese, white sugar, lemon juice, vanilla and sour cream. Add a dollop of the mixture to the indentation you made in each circle of dough. I find that about a tbsp works well, but you can use as little or as much as you like. If you like fruit with your danish, you can also add it to the rolls before the cream cheese mixture. (I like cherry pie filling or blackberry preserves, personally.) Bake for 15 - 20 minutes.
While the danish are baking, you can make a quick royal icing to drizzle over the tops. Mix together the confectioner's sugar, milk and butter in a small bowl. You can use a spoon to drizzle it over the tops of the danish, or you can put it into a small zip-top bag and snip of the corner for an easy "piping bag." Take the danish out of the oven and allow them to cool for 10-15 minutes before icing.
Voila! Cream cheese danish without leaving the house or breaking a sweat.

Friday, November 23, 2012

Thanksgiving Pictures

I have wanted to take pictures with Justin for years, but we just haven't had anyone do it.  Last year at Christmas we tried to take a few ourselves, but we were inside and it just didn't work very well.  Yesterday we were both home for Thanksgiving and he agreed to try again.  We got out the ladder and put the timer on the camera.  It worked!  I have a large frame I've been wanting to hang in the basement and now we have pictures to fill it! 


I hope you all had a wonderful Thanksgiving!  I am most thankful for this man in the pictures with me.  We've had our share of struggles, but God truly does cause all things to work together for good to those who love Him.
Happy Thanksgiving! 

Wednesday, November 21, 2012

Taste of Home Tuesday: Chocolate Chip Granola Bars

I enjoy the challenge of trying to make homemade versions of foods that people purchase everyday.  The most recent thing we have tried is granola bars.  The recipe I am posting today is the one we like best so far.  It makes a chewier bar which we prefer.  The neat thing that I have found with granola bars is I can add whatever "extras" I want.  Justin and I aren't too fond of coconut so, instead of using the coconut, I ground peanuts and almonds and substituted them in.  I really like the chocolate chips and I've also added craisins, raisins, and dates.  I like to put them all in the same bars.  I enjoy the different textures and flavors it gives the bars.  Justin prefers fewer "extras".  I love taking the same basic recipe and adding whatever I want.  Enjoy!!
 
Ingredients
4 cups old fashioned oats
1/4 cup whole wheat flour
1/2 cup shredded unsweetened coconut
1/3 cup brown sugar
1 cup chocolate chips*
1/2 teaspoon kosher salt
1/2 cup canola oil
1 teaspoon vanilla extract
1/2 cup honey

Preparation
1. Preheat oven to 325 F.
2. Combine the first 6 ingredients in a bowl.
3. In a separate bowl, whisk together the remaining ingredients.
4. Pour the wet ingredients over the oat mixture and stir to combine.
5. Place granola mixture on a parchment lined baking sheet and shape into a rectangle, about 13 x 9 x 1 inch thick.
6. Bake for 40 minutes.
7. Allow to cool completely then cut into 3 x 1 inch bars.**

* You can substitute raisins or other dried fruit for the chocolate chips.
** Individually wrapped, the bars will remain fresh for several weeks.

Wednesday, November 14, 2012

Taste of Home Tuesday: General Tso's Chicken

Justin and I enjoy eating Chinese food every so often.  If we are at a buffet we usually both end up with General Tso's Chicken on our plates.  Justin had the day off and was going to make dinner, he did some searching online and found this recipe.  I was amazed at how close it was to the restaurants sauce.  It was very thick and very tasty!  It made quite a bit so I froze the leftover sauce.  When we pulled it back out to eat over rice I just added a little water and microwaved it until it was back to the consistency we wanted.  This is a great recipe!  Enjoy!!   
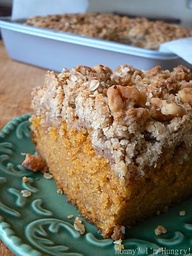
Picture by Lavender Lynn

Ingredients
3 lbs boneless skinless chicken breasts, cut into chunks
2 cups green onions, sliced
8 small dried chilies, seeds removed ( bird pepper or thai chilies are good)

Cornstarch slurry
1/4 cup soy sauce, low sodium preferred
1 eggs, beaten
1 cup cornstarch

Sauce
1/2 cup cornstarch
1/4 cup water
1 1/2 teaspoons fresh garlic, minced
3/4 cup sugar
1/2 cup soy sauce
1/4 cup white vinegar
1/4 cup sherry wine or 1/4 cup white wine
14 1/2 ounces chicken broth ( a can)

Directions
Place sauce ingredients in a quart jar with a lid and shake to mix. If you make this ahead of time just refrigerate until needed, shaking it again when you are ready to use it. This also keeps your dirty dishes down.

Mix cornstarch slurry in a large bowl- the mixture will be strange but trust me it works. It will be VERY thick almost paste like. Add chicken pieces to coat. Using a fork remove ONE chicken piece at a time and let the excess mixture drip off. YES even though the mixture has a weird consistency it will not stick like paste and the excess will drip off. Add chicken to the hot (350 degree) oil and fry until crispy. Only cook 7 or 8 chicken pieces at a time. You do not want to lower the temp of the oil by cooking too many at a time. You can use a simple cooking or candy thermometer to judge the temp of the oil.

Drain on paper towels. Keep warm- I just put them in the oven with the oven off. Repeating until all chicken is fried.

In a separate wok or large skillet add a small amount of oil and heat to 400 degrees. Again, a candy thermometer works great. You can fry all the chicken, drain the oil to the desired amount and use the same pan if you like.

Add green onions and hot peppers and stir fry about 30 seconds.

Stir sauce mixture, and then add to pan with onions and peppers, cook until thick. If it gets too thick, add a little water. The thickness of the sauce should be similar to what you get when ordering this at a restaurant.

Add chicken to sauce in wok, and cook until all is hot and bubbly. The quicker this is done the crispier the chicken stays.

Serve over rice.

Tuesday, November 6, 2012

Taste of Home Tuesday: Slow-Simmering Beef Bourguignon

Justin found this recipe and thought it looked tasty.  I agreed, however; I knew if we had it during the week I would not have time to make it according to the recipe.  Instead of browning the meat I just dumped it in the crock pot and took it to school with me.  When I got home I chopped the veggies and sauteed them until they were tender.  I followed the recipe once the veggies were ready.  It turned out very well!  Enjoy! 
Picture by Taste of Home
Ingredients
3 pounds beef stew meat
3/4 teaspoon salt
3/4 teaspoon pepper
3 tablespoons all-purpose flour
1-1/2 cups beef broth
1-1/2 cups dry red wine or additional beef broth, divided
3/4 pound medium fresh mushrooms, quartered
1 large sweet onion, chopped
2 medium carrots, sliced
1 thick-sliced bacon strip, chopped
2 garlic cloves, minced
2 tablespoons Italian tomato paste
Hot cooked egg noodles

Directions
Sprinkle beef with salt and pepper. In a large nonstick skillet coated with cooking spray, brown beef in batches. Remove with a slotted spoon to a 4- or 5-qt slow cooker. Add flour; toss to coat. Add broth and 1 cup wine.
In the same skillet, add the mushrooms, onion, carrots and bacon; cook and stir over medium heat until carrots are tender. Add garlic; cook 1 minute longer. Add remaining wine, stirring to loosen browned bits from pan; stir in tomato paste. Transfer to slow cooker.
Cover and cook on low for 8-10 hours or until beef is tender. Serve with noodles. Yield: 6 servings.

Monday, November 5, 2012

A thankful heart

I wanted to share Ann Voskamp's blog post again today.  What she is talking about tied in with our sermon from yesterday.  I love when God works things together like that.  A couple of things that stuck out to me,
"To bring the sacrifice of thanksgiving means to sacrifice your understanding of what is beneficial and thank God for everything because He is benevolent."

"A sacrifice of thanks lays down our perspective and raises hands in praise anyways-always."

"We give thanks to God not because of how we feel-but because of Who He is."

Here is the link to her post.  Enjoy!

Saturday, November 3, 2012

Sweetness

Several weeks ago Justin and I went down to Pretty Prairie to celebrate the September and October birthdays.  I had the privilege of baby sitting Wyatt while everyone else went to homecoming.  I took way too many pictures (if there is such a thing:)) but he was all smiles.    
He is not a tiny little baby anymore!
He found his voice and was squealing at me.
All smiles
Telling a story
"Why do you keep putting that camera in my face?"
He was playing with his elephant and it got stuck over his face.  He started shaking his head to get it off.
If finally slid to the side and he thought it was funny.
He was telling me all about it.
Last time I talked to mom she said he's rolling all over the place and really getting up on his arms.  It seems like he was just a teeny tiny baby!  I can't wait to see him again (and of course the rest of the family as well:))!

Thursday, November 1, 2012

Tomorrow's already Friday??

Tomorrow is already Friday and I just realized I've missed Taste of Home Tuesday.  It has been an incredibly busy week!  Monday we had a birthday party at the Pizza Hut.  Tuesday we grabbed a burger from the drive thru on the way to Life Group.  Wednesday we ate a sandwich before heading out to Trunk or Treat at church.  Thursday we grabbed a burger with some friends and shopped for our Operation Christmas Child boxes.  Tomorrow I plan on coming home after school and relaxing all weekend.  Thankfully next week will not be as busy.  I will post a yummy new recipe next Tuesday! 

Tuesday, October 23, 2012

Taste of Home Tuesday: Blueberry & Raspberry Baked Oatmeal

Justin and I have always eaten breakfast, but finding time in the morning to make something can be difficult.  This summer when blueberries were in season I tried this blueberry oatmeal.  I really enjoyed it.  It was not overly sweet like some breakfasts and was nice and quick for those busy mornings.
Blueberry & Raspberry Baked Oatmeal
makes 6 servings
nutritional value will vary depending on the fruit and ingredients you use

Ingredients:
1 cup old-fashioned rolled oats
1/4 cup chopped walnuts, divided
1/2 tsp. baking powder
3/4 tsp. ground cinnamon
Pinch of salt
1/4 cup maple syrup (I used sugar free)
1 cup milk (I used skim)
1 large egg, lightly beaten
2 tbsp. unsalted butter, melted and cooled slightly
1 tsp. vanilla extract
2-3 ripe bananas, peeled and sliced
1 cup blueberries or raspberries, fresh or frozen, divided

Directions:
Preheat the oven to 375F.
Lightly grease a 2-quart baking dish. In a medium bowl, mix the oats, half of the walnuts, baking powder, cinnamon, and salt. Stir to combine. In a liquid measuring cup, combine the syrup, milk, egg, butter, and vanilla. 
Spread the sliced bananas in a single layer over the bottom of the baking dish. Top with half of the berries. Sprinkle the dry oat mixture over the fruit in an even layer. Pour the liquid ingredients evenly over the oats. 
Sprinkle the remaining nuts and berries over the top. Bake for 35-40 minutes, until the top is browned and the oats have set. Let cool 10 minutes before serving.

Wednesday, October 17, 2012

Taste of HomeTuesday: Quick Potato Corn Chowder

I needed a quick meal one evening and loved how fast and easy this was.  I halved the recipe for just Justin and I.  I'm guessing one could freeze the leftovers for a week or so and it would still be good.  I'm sure we will be enjoying it several more times this fall and winter. 
Picture by Taste of Home
Ingredients
1 medium onion, chopped
1 tablespoon olive oil
2 cans (14-1/2 ounces each) chicken broth
3 large Yukon Gold potatoes, peeled and cubed
1 can (15-1/4 ounces) whole kernel corn, drained
1 cup 2% milk, divided
1/2 teaspoon salt
1/2 teaspoon pepper
1/3 cup all-purpose flour
Minced fresh parsley, optional

Directions
In a large saucepan, cook and stir onion in oil over medium heat until tender. Add broth and potatoes; bring to a boil. Reduce heat; cover and simmer for 10-15 minutes or until potatoes are tender.
Stir in the corn, 1/2 cup milk, salt and pepper. In a small bowl, whisk flour and remaining milk until smooth. Stir into soup; return to a boil. Cook and stir for 2-3 minutes or until thickened. Sprinkle with parsley if desired. Yield: 8 servings (2 quarts).

Tuesday, October 16, 2012

How to Make Sense of Suffering

I follow Ann Voskamp's blog on a daily basis.  She writes about joy; finding joy in everything, giving thanks to God in everything.  A couple of days ago she posted this video of David Platt speaking on making sense of suffering.  (David Platt is the author of the book Radical.)  It is most excellent and I wanted to share.  Enjoy.

http://www.aholyexperience.com/2012/10/how-to-make-sense-of-suffering-video/

Wednesday, October 10, 2012

Fall Decorations

I've been working on making some new fall decorations instead of buying this year.  Mom and I went to the Hillsboro Arts and Craft Show in September.  I bought the little pumpkins in the second picture from one of the booths there.  Many of the things were made out of painted or distressed wood.  Since we started remodeling we have an abundance of wood scraps.  It has been fun to have something to use them for.

The first two signs I used stencils and painted.  They both bled under the stencil more then I liked.
I used vinyl for the letters on the blocks.  I like how they turned out better than the paint.

Taste of Home Tuesday: Homemade Brownie Mix

I found this brownie mix on Pinterest several months back and decided to try them out on my kids at school.  Kids are always honest about whether something is yummy or not.:)  I doubled the batch so there would be enough and added some chocolate chips.  I watched them closely as they baked since one person had commented that the brownies turned out dry.  I took mine out of the oven a little bit early to assure that they were gooey.  Gooey they were!!  They were so yummy though!  Everyone of the kids LOVED them and asked for seconds.  I made some more the next night for a cake walk at school.  I left them in the oven a little bit longer so they weren't quite as gooey, but they were still moist with a great flavor.
One person commented that they would be really cute stored in a mason jar and/or used as a present.  I love this brownie mix and am excited not to have to buy a mix from the store again!      
Ingredients:
1 Cup Sugar
1/2 Cup Flour
1/3 Cup Cocoa
1/4 teaspoon Salt
1/4 teaspoon Baking Powder
Mix all these ingredients together with a whisk and dump them into a zipper bag. On the bag, add the following instructions:

Add: 2 Eggs, 1/2 Cup Vegetable Oil, 1 teaspoon Vanilla. Bake in an 8 x 8 pan @ 350 degrees for 20-25 minutes.

These should stay fresh in your pantry for at least 6 months.  To extend the freshness, store in your freezer for up to a year.

Wednesday, October 3, 2012

Taste of Home Tuesday: Crunchy Herbed Chicken Breasts

Justin and I went out for sushi for his birthday last month.  Some of the shrimp was breaded with panko bread crumbs and was very crunchy.  I have found several recipes since using the panko bread crumbs and was excited to try this one.  The chicken was not as crunchy as I was excepting it to be, but it had a very yummy flavor.  I also liked the fact that it was fairly quick and easy to make.  Enjoy!
Picture by Taste of Home
Ingredients
2/3 cup panko (Japanese) bread crumbs
1/2 cup grated Parmesan cheese
1/2 cup grated Romano cheese
1 tablespoon minced fresh oregano or 1 teaspoon dried oregano
1 tablespoon minced fresh basil or 1 teaspoon dried basil
2 teaspoons minced fresh parsley
2 garlic cloves, minced
1/2 teaspoon salt
1/2 teaspoon pepper
1/2 cup all-purpose flour
2 eggs, lightly beaten
6 boneless skinless chicken breast halves (5 ounces each)
Olive oil-flavored cooking spray

Directions
In a shallow bowl, mix the first nine ingredients. Place flour and eggs in separate shallow bowls. Dip both sides of chicken in the flour, eggs, then crumb mixture, patting to help coating adhere.

Place on a greased baking sheet. Spritz tops with cooking spray. Bake at 375° for 25-30 minutes or until a thermometer reads 170°. Yield: 6 servings.